概述
最近做项目遇到图片处理(图片打码和画线框)的问题,可选方案主要有两个:
- 前端使用canvas做图片处理;
- 服务端引入图片处理类库做图片处理;
其实两个方案都可以实现,但在页面上传图片,不需要存储图片处理结果且不需要兼容低浏览器的场景中,在前端做处理是更好的方案;若选择服务端处理不仅会涉及到图片的上传和下载,还会涉及到服务端对图片的存储和定时清理等等一系列问题,所以本文主要介绍如何使用canvas做图片处理–>打马赛克,理解这种图片处理的思路后,其他形式的图片处理原理也是一样的。
图片打码
思路分析
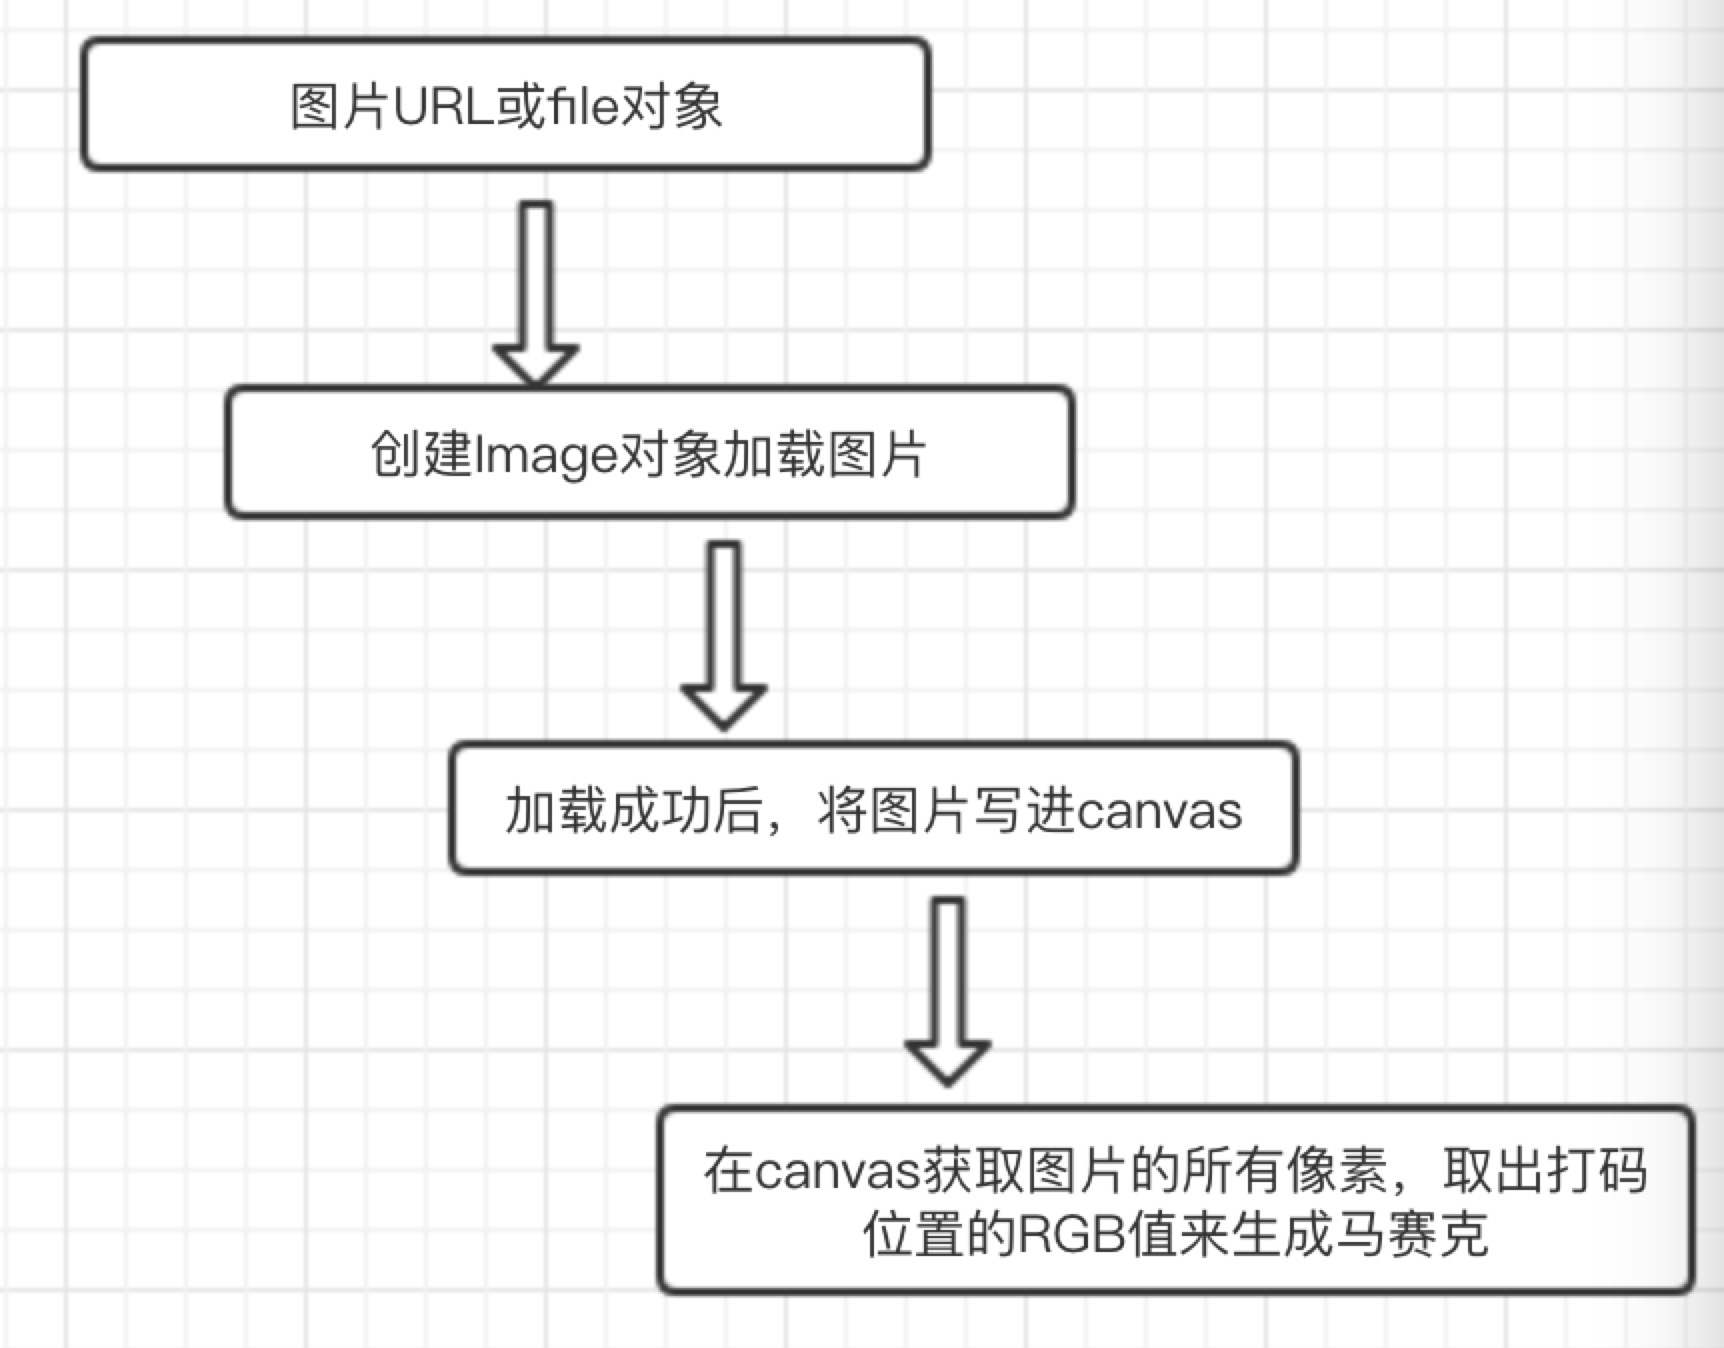
图片来源主要有两种,一种是直接使用图片URL,另一种是直接操作图片文件对象(File对象);但是无论哪一种方式,我们处理图片的原理都是一样的,主要是以下三个步骤:
- 创建Image对象对图片进行加载;
- 加载成功后,将图片写进canvas画布;
- 最后在canvas画布取出图片的所有像素点,取出打码位置的RGB值来画马赛克即可
代码实现
1.创建Image对象对图片进行加载;
首先我们要对图片来源分别进行处理,第一种使用图片URL,如下:
1
2
| var img = new Image();
img.src = "https://avatars1.githubusercontent.com/u/25859283?v=4";
|
第二种是图片File对象,File对象我们不能直接使用,需要借助URL.createObjectURL()的方法将File对象转成一个可用于图片src属性的新URL对象,这个URL对象是存储在程序内存中的,所以要在不需要使用这个URL对象时,需要手动调用URL.revokeObjectURL() 方法来主动释放该内存,如下
1
2
3
4
5
6
7
8
9
10
11
12
13
14
15
16
17
| //html
<input type="file" name="" value="">
//js
var inputEle = document.querySelector("input");
inputEle.addEventListener("change", function() {
var fileObj = this.files[0]
var img = new Image();
/*
当图片加载完成之后对象URL就不再需要了,释放对象URL
*/
img.onload = function() {
URL.revokeObjectURL(this.url);
}
img.src = URL.createObjectURL(fileObj);
})
|
注: 若需要获取图片像素或转成dataURL需设置Img的crossOrigin属性来处理跨域问题,即设置img.crossOrigin = ‘’,详情可参考这篇文章解决canvas图片getImageData,toDataURL跨域问题
2.图片加载成功后,将图片写进canvas画布;
将一张加载成功后的图片写进canvas画布非常简单,只需要三行代码即可,如下:
1
2
3
4
5
6
| var canvas = document.querySelector("canvas");
var ctx = canvas.getContext('2d');
/*
从左上角开始在画布上画图
*/
ctx.drawImage(img, 0, 0)
|
但以上代码是直接在页面的canvas元素上绘制图像的,若绘制的操作动作需要多次或反复进行,这样会导致浏览器实时不断渲染和绘制canvas元素所在的复合图层,这会在一定程度上性能页面的性能。所以我们更好的方式是动态创建一个存储在程序内存的canvas元素,然后在该canvas元素上进行画图以及马赛克绘制等等的操作,所有操作完成后直接将结果一次性绘制到页面上的canvas元素上,可提高绘制性能;
3.在动态画布上绘制马赛克;
在动态canvas画布上绘制图像完成后,我们可使用canvas上下文的getImageData()方法获取该图像的所有像素点,如下
1
2
3
4
5
6
| var canvas = document.querySelector("canvas");
var ctx = canvas.getContext('2d');
/*
获取图像的所有像素点
*/
var imageData = ctx.getImageData(0, 0, canvas.width, canvas.height);
|
其中imageData.data就是图像的所有像素点,也就是我们最熟悉的RGBA值,是一个一维数组,类型为Uint8ClampedArray,数组内的所有数值都不会超过2的8次方,该像素点数组内四个数值(R, G, B, A)表示一个像素点,其中A只有两个值,0和255,分别表示透明度0和1,如下

那么我们可根据图片的宽高得出图像像素点一维数组的长度,即width * height * 4,那么下面我们即可操作图像像素点来画马赛克了,假设我们每个马赛克的大小为10px,如下
1
2
3
4
5
6
7
8
9
10
11
12
13
14
15
16
17
18
19
20
21
| var r, g, b;
for(let y = 0; y <= canvas.height; y += 10) {
for(let x = 0; x <= canvas.width; x += 10) {
/*
获取具体位置上像素点的RGB值,然后在canvas上重新绘制图片
*/
r = imageData[(y * canvas.width + x) * 4];
g = imageData[(y * canvas.width + x) * 4 + 1];
b = imageData[(y * canvas.width + x) * 4 + 2];
color = `rgb(${r}, ${g}, ${b})`;
/*
在图像具体位置生成马赛克
*/
ctx.fillStyle = "red"
ctx.fillRect(x, y, 10, 10)
}
}
|
马赛克绘制完成后,再次调用canvas上下文的drawImage()方法将动态canvas画到页面上的canvas即可。
代码封装
这里将以上代码用面向对象的方式封装起来,实现在指定的区域打码以及画出线框,实现如下
构造函数
1
2
3
4
5
6
7
8
9
10
11
12
13
14
15
16
17
18
19
20
21
22
23
24
| /*
* @param target Object canvas目标元素
* @param image String|FileObject 图片url或文件对象
* @param mosaicSize Number 马赛克大小
* return dealImage实例对象
*/
function DealImage({target, image, mosaicSize=20}) {
this.canvas = document.querySelector(target);
this._canvas = document.createElement("canvas");
if(!this.canvas && this.canvas.getContext) return false
if(!image) throw new Error("缺少图片url")
this.opt = {
image: image,
mosaicSize: mosaicSize,
ctx: this.canvas.getContext('2d'),
_ctx: this._canvas.getContext('2d'),
fileName: this.getFileName(image)
}
}
|
原型对象
1
2
3
4
5
6
7
8
9
10
11
12
13
14
15
16
17
18
19
20
21
22
23
24
25
26
27
28
29
30
31
32
33
34
35
36
37
38
39
40
41
42
43
44
45
46
47
48
49
50
51
52
53
54
55
56
57
58
59
60
61
62
63
64
65
66
67
68
69
70
71
72
73
74
75
76
77
78
79
80
81
82
83
84
85
86
87
88
89
90
91
92
93
94
95
96
97
98
99
100
101
102
103
104
105
106
107
108
109
110
111
112
113
114
115
116
117
118
119
120
121
122
123
124
125
126
127
128
129
130
131
132
133
134
135
136
137
138
139
140
141
142
143
144
145
146
147
148
149
150
151
152
153
154
155
156
157
158
159
160
161
162
163
164
165
166
167
168
169
170
171
172
173
174
175
176
177
| DealImage.prototype = {
constructor: DealImage,
draw: function(_opt) {
var img = new Image(),
self = this;
img.onload = function() {
/*
获取图片上的所有像素点
*/
self.getImageData(img);
/*
处理打码
*/
if(_opt.mosaic) self.drawMosaic(_opt.mosaic)
/*
处理线框
*/
if(_opt.frame) self.drawFrame(_opt.frame)
/*
处理成功后,直接覆盖至页面上的目标canvas
*/
self.opt.ctx.drawImage(self._canvas, 0, 0)
/*
处理成功后,若传进的是file对象则主动释放内存
*/
if(self.url && typeof self.opt.image === "object") {
URL.revokeObjectURL(self.url);
}
/*
处理成功后的回调函数
*/
if(typeof _opt.callback == "function") {
let imgBase64 = self.canvas.toDataURL(_opt.type)
_opt.callback(imgBase64, self.opt.fileName)
}
}
/*
设置crossOrigin属性解决资源跨域问题,
不然无法调用getImageData和toDataURL方法
https://www.zhangxinxu.com/wordpress/2018/02/crossorigin-canvas-getimagedata-cors/
*/
img.crossOrigin = '';
/*
判断image类型,file对象则使用URL.createObjectURL转换成blob对象
*/
if(typeof this.opt.image === "string"){
img.src = this.opt.image;
} else {
this.url = URL.createObjectURL(this.opt.image)
img.src = this.url;
}
},
drawMosaic(_opt) {
if(!this.isJson(_opt.position)) throw new TypeError("参数必须是json数组对象")
var r, g, b, color, self = this;
_opt.position.forEach(function(item, index) {
if(!self.isObject(item)) return false
for(let y = item.start[1]; y <= item.end[1]; y += self.opt.mosaicSize) {
for(let x = item.start[0]; x <= item.end[0]; x += self.opt.mosaicSize) {
/*
获取具体位置上像素点的RGB值,然后在canvas上重新绘制图片
*/
r = self.imageData[(y * self._canvas.width + x) * 4];
g = self.imageData[(y * self._canvas.width + x) * 4 + 1];
b = self.imageData[(y * self._canvas.width + x) * 4 + 2];
color = `rgb(${r}, ${g}, ${b})`;
/*
在图像具体位置生成马赛克
*/
self.opt._ctx.fillStyle = color
self.opt._ctx.fillRect(x, y, self.opt.mosaicSize, self.opt.mosaicSize)
}
}
})
},
drawFrame: function(_opt) {
if(!this.isJson(_opt.position)) throw new TypeError("参数必须是json数组对象")
var self = this;
_opt.position.forEach(function(item, index) {
if(!self.isObject(item)) return false
/*
起始一条路径,或重置当前路径
*/
self.opt._ctx.beginPath();
/*
把路径移动到画布中的指定点,不创建线条
*/
self.opt._ctx.moveTo(item.start[0], item.start[1])
/*
添加一个新点,然后在画布中创建从该点到最后指定点的线条
*/
self.opt._ctx.lineTo(item.start[0], item.end[1])
self.opt._ctx.lineTo(item.end[1], item.end[1])
self.opt._ctx.lineTo(item.end[0], item.start[1])
self.opt._ctx.lineTo(item.start[0], item.start[1])
/*
绘制已定义的路径
*/
self.opt._ctx.strokeStyle = _opt.color;
self.opt._ctx.stroke();
})
},
isObject: function(obj) {
return Object.prototype.toString.call(obj) === "[object Object]";
},
isJson: function(option) {
if(!(option instanceof Array)) return false
var self = this, temp = [];
option.forEach((item, index) => {
temp.push(self.isObject(item))
})
return temp.length > 0 && !temp.includes(false)
},
getFileName: function(image) {
let filename;
if(typeof image == "string") {
let tempArr = image.split("/");
filename = tempArr[tempArr.length - 1].split(".")[0];
} else {
filename = image.name.split(".")[0]
}
return filename;
},
getImageData: function(img) {
this.canvas.width = img.width;
this.canvas.height = img.height;
this._canvas.width = img.width;
this._canvas.height = img.height;
this.opt._ctx.drawImage(img, 0, 0)
/*
获取图像像素点
*/
this.imageData = this.opt._ctx.getImageData(0, 0, this._canvas.width, this._canvas.height).data
}
}
|
使用
1
2
3
4
5
6
7
8
9
10
11
12
13
14
15
16
17
18
19
20
21
22
23
24
25
26
27
28
29
30
31
32
33
34
35
36
37
38
39
40
41
42
43
44
45
46
47
48
49
50
| //html
<canvas id="canvas"></canvas>
<p><img src="" alt=""></p>
<input type="file" name="" value="">
//js
var inputEle = document.querySelector("input");
inputEle.addEventListener("change", function() {
var img = new DealImage({
target: "#canvas",
mosaicSize: 10,
image: this.files[0]
})
img.draw({
type: "image/png",
mosaic: {
position: [
{start: [50, 50], end: [150, 150]},
{start: [200, 200], end: [300, 300]},
],
},
frame: {
position: [
{start: [50, 50], end: [150, 150]},
{start: [200, 200], end: [300, 300]},
],
color: "red"
},
callback: function(imgBase64, filename) {
let imgEle = document.querySelector("img"),
linkEle = document.createElement("a");
imgEle.src = imgBase64;
/*
下载图片
*/
// linkEle.style.display = "none";
// linkEle.download = filename;
// linkEle.href = imgBase64;
// document.body.appendChild(linkEle);
// linkEle.click();
// // 然后移除
// document.body.removeChild(linkEle);
}
})
})
|
总结
以上便是canvas图片处理思路以及代码实现,代码实现并不复杂。若要使用也可npm i dealimage,然后import DealImage from “dealimage”引进使用。